Category Archives: Food Presents

Decorated Chocolate Easter Eggs – using real eggs

As Easter approaches, I have been trying to think of interesting ideas for eggs or gifts.  It occurred to me that one could decorate real eggs and fill them with chocolate.  If you saw one of these in John Lewis they would cost you a fortune and rightly so as they look so glamorous.

You could have a lot of fun with the designs, using applique, stippling, marbling, or just using a bit of ribbon and some stick-on gems as I have done.  I have a big bag of ribbons, sequins, sparkly things etc so I tend to use what I already have in stock.  This is what I did:-

DECORATED CHOCOLATE EASTER EGGS

Make a hole

Utensils:
1 x large needle
Kitchen roll (paper towel)
1 x heatproof bowl for melting the chocolate
1 x saucepan
Icing syringe
Acrylic paints – matt and/or metallic
Acrylic varnish for matt paints
Paint brushes – thick & thin
Ribbons – assorted
Decorative gems

Melt the chocolate

Scissors
PVA glue
Egg cups
4oz / 120g good quality chocolate per egg

Method:
Using the needle make a hole about ¼ “ / 0.75cm diameter in the bottom of the egg
Waggle the needle gently inside the egg to break up the yolk
Drain the egg into a bowl for use as omelettes or to make a cake

Fill the egg with chocolate

Rinse the inside of the egg thoroughly and leave to drain and dry on a towel
Bring some water almost to the boil in the saucepan and place the heatproof bowl on top
Break the chocolate into pieces and place in the bowl
Melt the chocolate, stirring occasionally
Pour the chocolate into the syringe and fill the empty egg shell, leaving a little space for expansion
Wipe any excess chocolate off the shell and leave in a cool place to set
Paint the egg with several thin coats of acrylic paint, making sure not to get any paint on the chocolate
It’s best to do most of the top half first, leave it to dry and then do the remaining bottom bit
When the paint is dry, varnish if you need to and leave to dry

Paint the egg

Then decorate with ribbons and gems, fixing into place with a little PVA

When you come to eat the chocolate, hit the egg quite hard on the side and roll it a bit to crack the shell, a bit like you’d do with a hard-boiled egg.  Then peel the shell off and eat.

A box of eggs

The sadness and yet, the joy!

7 Comments

Filed under Food Presents, Seasonal, Slider

What I’ve been doing instead of writing articles for you.

Sorry I have posted anything for the last couple of days, I’ve just been a bit knackered which is a pretty poor excuse really; I have a job to do and a public to satisfy!  I’m going to Marlow tomorrow to see my mother on Mothers’ Day and also  to see 10cc in concert on Sunday night with Sister the Second.  You see, I do take your advice.

I’ve had a lot to prepare; obviously a card and gift for The Aged Parent, but also there are Easter eggs to deliver and a present for Sister the First whose birthday is in a couple of weeks.

Below are some pictures of how I attempted to make a gift of Lindt Chocolate Bunnies more exciting and also a small Easter Basket for a mildly diabetic mother who can eat one tiny egg a day without fighting the desire to eat the whole lot.  I wish….
The photos aren’t great, but they give you an idea.

Four Bunny Basket

Two Bunny Basket

Easter Basket with Coalport China Egg

3 Comments

Filed under Food, Food Presents, Slider

Easy cupcakes for any occasion

I’m not one for jumping on fashion bandwagons of any kind and I’m sure many of us having been making cupcakes or fairy cakes for as long as we can remember; what’s the big deal?

Of course, there isn’t one.  Cupcakes are simply 4442 sponge mixture with the decoration of your choice on the top.  You can take a week making sugar flowers or you can go to a decent kitchen shop and buy some, it all depends on the occasion.  Cookshops usually have a fabulous selection of ready-made decorations, food colourings, edible glitter and pearls.  You can have such fun and don’t need to be a skilled cake decorator to produce something lovely.

Boy the Younger will be 8 tomorrow, so I am sending him in with a tray of simple cupcakes to share with his school friends as he won’t be having a proper celebration until next month.  I’m going to do the same thing that I did for Boy the Elder’s birthday and take him and his chums to an English Heritage property and take a picnic.

  • I trebled the amount of mixture, doing 12 12 12 6 quantities which made 36 cakes
  • I trebled the quantities for the mock cream for the top. 
  • I tinted the mock cream with a tiny bit of pink food colouring – pastes are better than the cheap liquid stuff you get in the supermarket
  • I piped it through a wide serrated icing nozzle such as one might use to pipe mashed potato
  • I bought the sugar flowers and edible pearls from the Kitchen Range shop in Market Harborough
  • I used co-ordinating paper cases for the type of decoration I was doing

I was really pleased with these.  Unused as I am to blowing my own trumpet, I have a duty to let you know that I have a trumpet, so that you can have a go at making these yourselves.

13 Comments

Filed under Children, Family and Friends, Food, Food Presents, Recipes, Storecupboard

Home Made Sweets 3 – Coconut Ice

Coconut Ice

I love coconut ice.  Unfortunately my children do not. 
Their friends do, though, and they love me for it.
This is a good recipe for you to do with your children over half term.

You might also like to have a go at Fudge and Truffles.

COCONUT ICE

Utensils:
1 x large heavy based pan
1 x cooking thermometer (ideal but not necessary)
1 x shallow 8×10” cake tin (20x25cm ish?)

Ingredients:
1lb / 480g granulated sugar
¼ pint /150ml milk
5oz / 150g desiccated coconut
pink or green food colouring
a little butter for greasing the tin

Method:
Grease the tin with a little butter
Put the milk and sugar into the pan and put it on a low heat, stirring continuously until the sugar has dissolved
Bring to the boil, then continue on a rolling boil, stirring frequently, until the mixture reaches soft ball* or 14oC
Take great care not to let it burn or you will completely spoil the flavour
Take the pan off the heat and add the coconut, mixing it in well
Pour half the mixture into the tin and pop it in the fridge to cool
Add a little food colouring to the remaining mixture and stir well in
Pour the coloured mixture over the first, white, half in the tin
When cool, mark into bars or squares with a sharp knife
Leave to go completely cold then cut it up properly

* I would recommend buying a sugar thermometer if you don’t already have one, as it saves a lot of time dropping boiling gloop into saucers of water.  If you don’t have a thermometer, the mixture has reached ‘Soft Ball’ when a teaspoon of the mixture dropped into cold water forms a soft ball when rolled between your finger and thumb.

9 Comments

Filed under Children, Food, Food Presents, Recipes

American style cookies with an English twist

Boy the Elder has been away at Scout Camp this weekend – rather him than me – it’s freezing.  So Boy the Younger and I decided to do some baking to welcome him home and make the most of the oven which was on for the Sunday Roast. We never put the oven on just for one thing!

A year and a half ago I experienced a loss.  I had a small, yellow notebook in which I wrote down and perfected my own recipes and which I had been writing for about five years. It was full up and I was a quarter of the way through a second volume, again handwritten, and I never bothered to commit the recipes to memory because they were written down; I kept meaning to type them up but never quite got round to it. 

You know what’s coming don’t you?  In the last but one house move the book went missing.  Volume 2 made the journey but Volume 1 has never surfaced.  I keep hoping it will turn up, hidden inside another book, or stuffed at the bottom of a box, but I don’t hold out much hope.  It is irreplaceable and I can’t even remember what half the recipes were.  Compound swearing doesn’t even begin to cover it.

I had a great craving for these soft cookies today, so BTY and I did a bit of experimenting and came up with these. They also make a very welcome present, in nice box or tin lined with tissue paper.  Hope you like them.

THE WARTIME HOUSEWIFE’S LUXURIOUS COOKIES – makes about 30

Utensils:
1 large mixing bowl
1 x electric food mixer
3 x large baking trays – greased and floured
2 x wire cooling racks

Ingredients:
6oz / 180g butter
2 large or 3 small eggs
4oz / 120g dark brown sugar
6oz / 180g white sugar
2 tsp vanilla extract
12oz / 360g self raising flour
12oz / 360g whatever you want to put in – I used:-
          4oz chopped marzipan
          4oz chopped dark chocolate
          4oz quartered glace cherries

Method
:
Pre-heat the oven to 180 / 360 / 4
Beat the butter, eggs, sugars and vanilla with the mixer until creamy thoroughly mixed
Beat in the flour to form a stiff dough.
Stir in all the remaining ingredients until they are evenly distributed throughout the dough
Form the mixture into balls (about the size of a golf ball) and place on the baking sheets, leaving plenty of space for them to spread – a 12″ tray should accommodate 8 or 9
Bake for 12-15 minutes until pale golden
Leave on the tray to ‘set’  for 1-2 minutes
Transfer to a wire rack to cool

2 Comments

Filed under Food, Food Presents, Life in general, Recipes

Heaven Scent: How to make Rose Water

The hedgerows are so rich and fecund this year, I would pretty much call it showing off.  The hawthorn and blackthorn blossom shed clouds of petals on the roads and pavements as though nature had hosted a wedding on every corner. Now the elderflowers and wild roses have taken over and the sights and smells are just heavenly.

Being The Wartime Housewife, I don’t just enjoy the flowers and smells – I see food and cordials and natural preparations of all sorts.  I was briefly standing with my nose in a rose bush on Monday, taking great lungfuls of their heady scent and I remembered my sisters and I attempting to make perfume when we were children with the rose petals from our garden.  It smelled gorgeous for about 24 hours and then it went brown.

But now, darling acolytes, I know how to do it properly.  Rose Water can be made with either wild or cultivated roses.  It can be used both as a perfume, a cosmetic (as an astringent, particularly for fair and dry skin) and a flavouring for puddings and sweets; who can resist rose flavoured Turkish Delight with its thick coating of icing sugar?

ROSE WATER

Utensils:
1 x large cooking pot with a rounded lid– large enough for a brick
1 x slightly smaller bowl
1 x house brick

Ingredients:
4 pints rose petals
Water
2-3 trays of ice Cubes

Method:
Put the brick into the cooking pot, then put the bowl on the brick
Put the rose petals into the pot (around the brick)
Top up the pot with water to about level with the top of the brick
Place the lid upside down over the top of the bowl and the pot making sure that the handle in the middle of the lid is right over the bowl
Put the pot on the stove and heat and bring to the boil
As soon as it boils, put the ice cubes on top of the lid
Immediately turn down the heat and let it simmer
The steam will then start to condense and drip into the bowl
After about 20 minutes lift the lid quickly and take a teaspoon of the liquid.  When it begins to taste and smell strongly of roses remove the bowl from the heat.  It should only take about 40 minutes.
Pour the rosewater into sterilised bottles and store.

Well done.  You have just done home distilling.

11 Comments

Filed under Food, Food Presents, Hedgerows, Recipes, Seasonal, Uncategorized

It’s Elderflower Time! Make some cordial

Boy the Younger took the photo. Shame it wasn't Boy the Elder.

We love squashes and cordials and every year I make a large batch of Elderflower Cordial.  Elder is rife absolutely everywhere and it should be easy to find enough heads to make at least a few bottles.  I usually buy a few of those flat bottles with the self-bunging corks to give as summer gifts to people I like.  Food presents are always welcome.

As long as you sterilize the bottles properly, the cordial will last a long time.  If you make absolutely loads, a Camden tablet popped into each bottle will kill off the yeasts and allow you to store your cordial almost indefinitely – chemists can usually supply these.

If you can, pick the cream coloured elderflower heads on a warm, sunny afternoon.  The starches will be higher then and the resultant cordial will be sweeter.  Dilute the cordial  with still or fizzy water (1 part cordial to 10 parts water – approx).  Delicious.

Utensils:
2 x large pans
1 x large sieve
sheets of muslin to line a sieve OR a jelly bag
1 x funnel
1 x large spoon for scum skimming
Glass bottles

Ingredients:
35 elderflower heads
3 pints / 1.75l  water
3lb / 1.5k white granulated sugar
3 lemons – sliced
2oz / 60g tartaric or citric acid

Method:
Sterilize your bottles like this
or fill the bottles with hot water right to the top, to which has been added 1 Camden tablet and leave for the prescribed time. Empty out the water just before you are ready to fill the bottle.

Place the elderflowers, water, sugar and lemons into the pan
Put the pan onto a low heat, stirring occasionally until the sugar has dissolved
Remove from the heat and add the citric or tartaric acid
Cover the pan and leave to infuse overnight
Strain the liquid into a large pan
Then strain it again through the muslin or jelly bag – I do this twice to reduce any light residue
Using the funnel, fill each sterilized bottle, leaving about an inch and a half of space at the top
Wipe clean and seal
Attach suitable labels including the date on which it was made

7 Comments

Filed under Food, Food Presents, Hedgerows, Recipes, Seasonal

The Great Marmalade Wars: Recipe 2

And now for Long Lost 2’s recipe for a dark, chunky marmalade.
Follow this link for tips on sterilising jars and the setting point for jam.

SEVILLE ORANGE AND LEMON  MARMALADE – DARK, CHUNKY

Makes approx 7-8 lbs of marmalade

Utensils:
1 x large saucepan (preferably heavy bottomed)
1 x chopping board
1 x sharp knife
1 x wooden spoon
7-8 jam jars

Ingredients:
3lb / 1.35kg Seville oranges
2 lemons
3 ¾ pints / 2.5 litres of water  
5lb / 2.7 kg granulated sugar  

Method:
STAGE 1:
Place the fruit ,washed, in the preserving pan with the water. Bring to a gentle simmer

Take a large piece of double foil, to put over the top of the pan, folding the edges firmly over the rim so that the fruit gently poaches, and without the liquid evaporating (takes 3 hours).

Leave overnight to cool- or at least several hours.

STAGE 2:
Place a colander over a bowl, and using a draining spoon remove the fruit.
Cut the oranges and lemons in half and scoop out the fleshy bits.
Add this pulp and a pint of the overnight liquid and put in a saucepan to boil for 10 minutes

While the pulp is cooling you can cut up the peel- fine or chunky.
Put this back in the preserving pan in the liquid

When cool- strain the pulp mixture through a fine sieve to get rid of the liquid, then a muslin cloth (I use my hands to extract all the juices)
Throw away what’s left in the muslin.

STAGE 3:
Warm the sugar in the oven in a roasting tin at 170/350/4 for 10 minutes.

Heat the contents of the preserving pan-(liquid, juices and peel), and when warm put in the warmed sugar.
Using a wooden spoon stir in the sugar and make sure that all the sugar is dissolved before allowing the mixture to boil

It takes 3-4 hours to develop a dark rich flavour.

2 Comments

Filed under Food, Food Presents, Recipes

The Great Marmalade Wars: Recipe 1

In the shop-bought marmalade stakes, it would be hard to better Frank  Cooper’s Oxford or Tiptree’s, but a jar of home-made marmalade is a most welcome gift.  Long Lost 1 and Sister the Second are both very skilful with a preserving pan and both insist that their recipe is the best.   I would suggest that they are both delicious, but would suit different tastes; S2’s is a light, thin shred marmalade, whilst LL1’s is a dark chunky marmalade.  I will feature both over the next two days and you can decide for yourselves.

You can actually buy tins of prepared Seville oranges for £1.99 which I know is cheating but takes a lot of the labour out, and means you can make marmalade even when Seville oranges aren’t in season. One tin makes about eight small jars apparently.

Follow this link for tips on sterilising jars and the setting point for jam.

SEVILLE ORANGE MARMALADE – LIGHT, THIN SHRED  

Utensils:
1 x large saucepan
1 x preserving pan or a large heavy bottomed pan
1 x chopping board
1 x sharp knife
7-8 jam jars

Ingredients
9 whole, unpeeled Seville oranges
Approx. 1lb 5 oz (600g) jam sugar
A knob of butter (just in case)

Method
Wash the oranges and put them into a large saucepan with enough water to cover them well.
Simmer for an hour, change the water (but keep it in case you need it to make up the water in stage 2) and simmer for a further hour until the oranges are so tender that a pin head will easily pierce the rind.

Remove the oranges, allow them to cool and reserve the liquid. Take off the peel and slice into required size shreds. Cut up the pulp, discard the pips and weigh.

For every 400g pulp use 600g sugar and 500ml of the reserved liquid, made up with water (from stage 1) if necessary. Put the pulp, sugar and liquid into a preserving pan and stir over a low heat to dissolve the sugar. Add the peel and bring back to a fast boil for 10 minutes. A small knob of butter will get rid of the slight foam on top.

Begin testing for a set. When the desired consistency has been reached, take the pan off the heat and leave to cool until a skin begins to form. While it is cooling, sterilise the jars if not already done. Stir the marmalade gently to distribute the peel evenly and then pour into warm, sterilised jars, cover and seal.

4 Comments

Filed under Food, Food Presents, Recipes

A very rich and very versatile Chocolate Cake

I developed this recipe firstly because we are a chocolate cake kind of family, but secondly to cope with celebration cakes that may need to last a while.  It is really rich and sticky and is easy enough to make for a tea time favourite, but because it is quite dense in texture, it can be shaped quite easily for special occasion cakes.  This can be made from storecupboard ingredients.

The engagement cake

A friend of mine is having an engagement party tomorrow, so I’m using this recipe (x3) for the cake.   I will show it to you when I’ve finished it.

RICH CHOCOLATE CAKE

Utensils:
1 x medium mixing bowl
1 x measuring jug
1 x electric mixer
2 x 8” cake tins
1 x wire rack for cooling

Ingredients:
6oz / 180g self raising flour
2oz / 60g cocoa
¼ tsp baking powder
6oz / 180g white sugar
4oz / 120g butter
2 eggs
6tblspns golden syrup
¼ pint / 150ml milk

1 quantity of buttercream or mock cream for the filling

Method:
Pre-heat the oven to 160/325/4
Grease and flour the two cake tins
Sift the flour, cocoa and baking powder into a bowl
Stir in the sugar
Rub in the butter until the dry mixture is like very fine breadcrumbs
Beat the milk, eggs and syrup together
Beat the liquid into the dry ingredients until smooth
Divide the mixture equally between the two tins
Bake for 50-60 minutes or until a skewer poked into the middle comes out clean
Remove from the oven and leave to cool slightly, then turn out onto a wire rack to cool.

When completely cold, sandwich together with the buttercream.

A nice treat is to pipe butter cream shells or stars to form a circle around the top edge, then pour melted chocolate in the middle.  Spread it out so that it goes right up to the edge of the buttercream circle.

15 Comments

Filed under Entertaining, Food, Food Presents, Recipes

Home Made Sweets 1: Snuffling around for Truffles

I often make up boxes of these for presents and always make a batch to finish off a dinner party.  They’re really simple, if a little messy, to make and are absolutely delicious.  The white ones particularly melt in the mouth.  Always use the best quality chocolate you can afford.

They are also very useful if you’re feeling a bit too thin after Christmas and need to add a few pounds to get up to your proper fighting weight.  Makes approx. 30 truffles.

WHITE CHOCOLATE TRUFFLES

Utensils:
1 x medium saucepan
1 x medium bowl which will fit on top of the saucepan
1 x small bowl for the icing sugar/cocoa

Ingredients:
8oz / 240g white chocolate – broken into pieces
2oz / 60g unsalted butter – cut into small pieces
3 tblspn single cream
Cocoa or icing sugar to coat (according to your preference)

Method:
Place the bowl over a pan of hot water
Put the chocolate in and stir occasionally
When it has melted, remove the bowl from the heat and stir for 1-2 minutes until it has cooled slightly
Gradually stir in the butter
Slowly fold in the cream
Cover the bowl and chill until firm
Form the mixture into 1″ / 2.5cm balls and roll in the icing sugar or cocoa
Keep chilled (good advice for us all I think)
Serve them in petit four cases

BRANDY TRUFFLES

Utensils:
1 x medium saucepan
1 x medium bowl which will fit on top of the saucepan
1 x small saucepan
1 x electric whisk or a good firm hand whisk
1 x small bowl for the icing sugar/cocoa

Ingredients
:
12oz / 360g plain chocolate – broken into pieces
¼ pint / 5floz of double cream
4 tblspns brandy (or rum)
cocoa or icing sugar to coat (according to preference)

Method:
Place the bowl over a pan of hot water
Put the chocolate in and stir occasionally
When it has melted, remove the bowl from the heat
Warm the cream in the small saucepan until just tepid and then stir it into the chocolate
Allow to cool then stir in the brandy
Whisk the mixture until it has turned lighter in colour and holds soft peaks
Cover and chill until firm
Form the mixture into 1″ / 2.5cm balls and roll in the icing sugar or cocoa
Keep chilled and serve in petit four cases

3 Comments

Filed under Entertaining, Food, Food Presents, Recipes, Storecupboard

Baking for Fetes made Easy: sponge cake, Flapjacks, Brownies, Eccles Cakes, Cherry & Coconut Cake

I am constantly being asked to bake cakes for fundraising events, and in the last couple of weeks the requests have been coming thick and fast because of the Haiti relief appeals.  I am normally only too happy to contribute to the various cakes stalls, but I have to confess that today, I had reached my compassionate limit.  I marched into school with my head held high, handed over a crisp fiver at the gate and went home to do one of the thousand other jobs waiting to be done. 

However, there are lots cakes which can be made which don’t require too much effort and taste delicious. It might be worth making several of one cake so double or triple the ingredients accordingly.  Most of these can be made using storecupboard ingredients.  Sorry, no pictures; like I said, I haven’t baked (I will at the weekend though)

VARIATIONS
Use my Basic Sponge mix to make a Victoria Sandwich or bake in little paper cases and get your children to decorate them with glace icing and sweets. Click on the link for the recipe.

FLAPJACKS
Very quick, very easy, vaguely healthy – click on the link for the recipe.

CHOCOLATE BROWNIES
Really easy and everyone loves them.

CHERRY AND COCONUT CAKE

Utensils:
1 x large mixing bowl
1 x small bowl
1 x measuring jug
1 x metal tablespoon
1 x 1lb loaf tin or an 8″ cake tin

Ingredients:
5oz / 150g self raising flour
¼ tsp salt
4oz / 120g white sugar
3oz / 90g butter – cut into small pieces
1 egg
4 floz milk
6oz / 180g glace cherries,washed, drained and cut in half
2oz / 60g dessicated coconut

Method:
Pre-heat the oven to 180 / 350 / 4
Grease and flour the cake tin ( or use a liner for speed)
Put the flour and sugar into a bowl and stir in the sugar
Rub in the butter until it resembles fine breadcrumbs
Beat the egg and milk together in a jug
Mix the cherries and coconut together (important as the coconut coating stops the cherries sinking)
Add everything to the flour mixture and fold in gently with the spoon
Bake for 45-50 minutes until firm or until a knife stuck in the middle comes out clean.
Leave to cool in the tin for 10 minutes then remove and transfer to a wire rack to cool.


ECCLES CAKES

Utensils:
1 x rolling pin
1 x pastry brush
Something about 6″ / 15cm diameter to cut round
1 x baking tray
1 x medium mixing bowl
small bowls for water and sugar

Ingredients:
1 pack of puff pastry
1oz white sugar (you may need a little more) for dipping
water for brushing
4oz / 120g currants or raisins
1oz / 30g dark brown sugar
1oz / 30g butter – melted

Method:
Pre-heat the oven to 220 / 425 / 7
Grease and flour the baking tray
Roll out the pastry to about 1/8″ / 3mm thick and cut out as many rounds as possible
Mix the dried fruit, brown sugar and butter together
Place a dessertspoonful of mixture in the centre of each round
Brush a little water round the edges of the pastry rounds and fold into the middle, pinching slightly to seal
Make a couple of slits in the top with a knife
Brush each cake with water and dip the wet side into the sugar
Place on the baking sheet and cook for 15-20 minutes or until the tops are golden brown
Transfer immediately to a wire rack to cool

This lot should get you some Brownie points. (chocolate variety obviously).

1 Comment

Filed under Children, Community and shopping, Food, Food Presents, Recipes, Storecupboard

…and now for the Icing on the Fruit Cake

Good enough to eat

This simple Poinsettia design looks lovely and is not difficult.  You will need some holly cutters which should be easily available from any decent cook shop.  The one’s I used had a veining stamp which makes the leaves look a bit more realistic.  Getting royal icing absolutely flat is a skill which has to be learned like any other, and for this cake isn’t necessary.  A few swift strokes with a wet palette knife are quite sufficient as long as you can get it to follow the line of the cake, as the top will be covered with leaves and the sides with a ribbon. 

You need to leave the royal icing to dry on your cake at least over night, so put the icing on, then make the leaves, then leave the both to dry.  The leaves can then be applied the following day.

Utensils:
1 x large mixing bowl
1 x electric hand mixer
1 palette knife
1 x jug of warm water
2 x holly cutters – 1″ & 1 ½”, ideally with a veining stamp
1 x rolling pin
paint brushes
greaseproof paper

Ingredients:
1 x marzipanned cake
1 x pack royal icing mix
Icing sugar for dusting
1 x pack of ready made red fondant icing
1 x pack of ready made green fondant icing
a tiny bit of cream or white fondant or some mimosa balls for stamens
1 x pot edible glue
1 x pot edible glitter – disco neon electric lime (or similar)
1 x pot edible glitter – disco red
1 length of ribbon

Method:
Make up the royal icing as per the instructions on the pack.  It is important to beat the icing for the prescribed length of time; use an electric mixer or your arm will drop off if you attempt to do it by hand.  And we wouldn’t want that would we?

Using a palette knife, apply the icing to the cake in confident strokes.  Dip the knife into a jug of warm water and it will spread much more evenly.  Make sure that every bit of marzipan is covered and I would recommend a thickness of about 1cm of icing.
Wipe any splodges of icing off the cake board with a damp cloth
Lightly cover your work surface with icing sugar
Roll out about 1/3 of the green icing to a thickness of about 1/8″ / 2mm
Dip the cutter lightly in some icing sugar and proceed to cut out about 20 large leaves and 6 small leaves of each colour
Lay them out on the greaseproof paper
Working on 3-4 at a time, paint each leaf with sugar glue
Using a separate brush, immediately dust each painted leaf with glitter of the same colour
Leave to dry overnight.  Remember to rinse out your brushes.

Paint some sugar glue onto the back of a green leaf and place on the outside edge of the cake, pressing gently into place, then work your way round the edge, placing them at slightly different angles

Apply another layer, slightly further in and overlapping a bit (see photo)
Then do the same with the red leaves, finishing with a few little ones in the middle
Put a few tiny balls of white/cream fondant in the middle to look like stamens
Leave to dry

Finish off the cake with a nice, broad ribbon and glue it in place at the back.  I have just used plain ribbon but you could add a jolly bow.
Place in an obvious place so that everyone who comes to your house can completely unexpectedly admire it

2 Comments

Filed under Christmas, Food, Food Presents, Recipes, Seasonal

A marvellous Christmas Cake Recipe

Ideally, one should have baked a Christmas Cake a week ago, but there is still plenty of time if you feed it with brandy twice a day instead of once.  I will do two more posts on how to marzipan the cake and a simple decorative icing.  Also do remember that Christmas Cake is full of fruit and is therefore health food.

Also remember that a small Christmas Cake makes a lovely and welcome gift, particularly for someone who doesn’t have the time to bake, or is perhaps on their own and can’t manage a bigger one.  Adjust the quantities accordingly. 

Lining a cake tin:   When baking a heavy fruit cake, you need to line the tin properly with greaseproof paper. 
Lay out your greaseproof paper on a flat surface and trace round the bottom of the tin twice
Cut out the two circles and set aside
Cut a long strip, the circumference of the tin and about 1″ (2.5cm) deeper than the tin.  Make small cuts at regular intervals all along one long edge.
Grease the tin then place one circle of greaseproof in the bottom
Grease this circle of paper lightly then put the long length of paper around the inside of the tin, snipped side at the bottom so that is overlaps the ready greased circle.
Then place the second circle of greaseproof paper on top of that. 

CHRISTMAS CAKE

Utensils:
1 large mixing bowl
1 x food mixer
Greaseproof paper
Newspaper
String

Ingredients:
8oz soft brown sugar
8oz butter
4 eggs – beaten
1½ tablespoons black treacle
9oz wholemeal self-raising flour
1½ teaspoons mixed spice
14oz raisins
14oz sultanas
12oz currants
6oz glacé cherries – halved
2oz chopped almonds

Method:
Cream the butter and sugar until very pale 
Beat in the eggs, then mix in the treacle
Gradually fold the flour into the mixture 
Once it is all combined, add all the other ingredients.

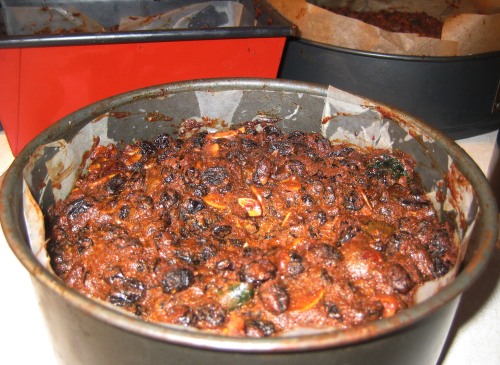
Spoon the cake mixture into the prepared tin, leaving a deep indentation in the middle so that it rises flat
Wrap newspaper around the outside of the tin, leaving a good 2” of paper above the top of the tin 
Secure with the paper with string (do not use plastic string as this will melt).
Bake at 150ºC for 2 hours, then at 140ºC for 1 hour
Remove the newspaper, then leave to cool in the tin 
Each day, drizzle half a capful of brandy or rum over the cake until you are ready to marzipan and ice it

9 Comments

Filed under Christmas, Food, Food Presents, Recipes, Seasonal

Stir Up a Christmas Pudding, O Lord!

Yesterday was the first Sunday of Advent and was therefore Stir-Up Sunday.  This is so called because the collect on the Sunday before Advent begins “Stir up, we beseech thee, O Lord, the wills of thy faithful people; that they, plenteously bringing forth the fruit of good works, may of thee be plenteously rewarded.” 

For those of us more focussed on our tummies, this prayer acts as a reminder to stir up fruit of the dried variety and reward ourselves with a delicious Christmas Pudding.  I always get anyone in the house at the time to take a turn at stirring and make a wish while they do so.  My recipe makes enough pudding to feed a small market town, as it is a variation on my grandmother’s recipe from a time when they made two puddings, one to be eaten this year and one to be kept for next.  I don’t hold with this as a year old pudding strikes me as being fairly pointless and a tradition too far.  If you are determined to do it, simply double the quantities listed below.

If you have nut allergists in the house, leave out the almonds and add an extra ounce of raisins or cherries.

And don’t forget, a home made Christmas Pud. makes a lovely and welcome gift, wrapped in a muslin cloth with an attractive ribbon, so think ahead.  Imagine the delight of receiving a bottle of home made Sloe Gin and a round fat pudding; it stirs me up, to be sure. 

And another thing.  Do remember to put some choking hazards in the pudding before you serve it.  A silver coin or a lovely charm are absolutely necessary in your Christmas Pudding and don’t let anyone tell you otherwise.

Utensils:
1 x very large mixing bowl
1 x chopping board
1 x vegetable peeler
1 x grater
Greaseproof paper
String
Scissors
1 x large pudding bowl suitable for steaming –  if you have a pudding bowl with a pierced lid, you won’t need the greaseproof, scissors or string
1 x large pan for steaming

Ingredients:
¼ lb / 120g self raising flour
¼ lb / 120g wholemeal or granary breadcrumbs
¼ lb / 120g suet
¼ lb / 120g currants
¼ lb / 120g raisins
¼ lb / 120g sultanas
¼ lb / 120g glace cherries – quartered
3oz / 90g dark brown sugar
2oz / 60g flaked almonds
1 apple – peeled cored and finely chopped
1/8 tsp mixed spice
¼  tspn cinnamon
1/8  tspn nutmeg
the juice and grated rind of ½  lemon
2 large eggs (or 3 small to medium)
1 tablespoon black treacle
1/8  pint / 75ml brandy
¼ pint / 150ml bitter beer

Method:
Mix the flour, breadcrumbs and suet together
Add the dried fruit, almonds, apple, cherries and spices and mix well
Add the eggs, treacle, brandy, bitter beer and lemon  and mix thoroughly
Cut a circle of greaseproof paper about 4″ / 9cm larger than the circumference of the pudding bowl
Make a pleat in the middle of the greaseproof paper (to allow for expansion)
Put the mixture into the pudding bowl and flatten the top, leaving at least 1″ / 2.5cm between the mixture and the rim of the bowl
Place the greaseproof paper on top and tie onto the bowl with string
Place the pudding into the large pan and fill with water half way up the pudding bowl
Bring to the boil, turn down the heat, cover and simmer for 8 hours, constantly topping up the water.
When the pudding is cooked and cooled, wrap it in greaseproof paper, then wrap it again in a muslin cloth
Hang it in a cool place in your kitchen until Christmas
When you come to eat it, it can be steamed again for 3 hours or heated in the microwave for about 4 minutes!  The decision is yours.

9 Comments

Filed under Christmas, Food, Food Presents, Recipes, Seasonal