Tag Archives: acrylic paint

How to make an attractive display case out of an old cutlery tray

Cutlery trays

Old wooden cutlery trays can make useful display cases or storage trays for little things.  My boys love little things and have masses of tiny plastic abominations which are carefully abandoned about the house in case I should feel the need of a nasty accident.

I had a cutlery tray left over when I bought a larger one to accommodate a new cutlery set, but you can pick them up at junk stalls from between 10p and £1.  I bought acrylic paints because they dry very quickly and wash off hands and clothes easily with soapy water; these cost about £1.25 a bottle and last quite a long time.  I found the felt squares in the local stationery shop costing 45p each.  For sticking the felt, you can use PVA glue, although I used a hot glue gun in the interests of speed and less mess.

First coat of paint

HOW TO MAKE A DISPLAY CASE:

Utensils:
1 x wooden cutlery tray
Acrylic paints
Felt
PVA or hot glue
Paint brushes – 1cm wide
Scissors
You might also like some transfers or sparkly things or varnish
2 x Small mirror plates if you wish to hang it on the wall

Line with felt

Method:
Firstly, choose your colours
Then paint the insides of the tray, overlapping a bit on the bottom where the felt will go
Leave it to dry then apply a second coat
Then paint the outside edges, leave to dry then apply another coat
Lastly paint the back, leave to dry then apply another coat
If you are varnishing, apply a thin coat and leave to dry, applying another coat if necessary
Cut out the felt to the size of the compartments
Glue the felt into place, making sure the glue goes right to the edges

Add extra decoration

Apply any other decorations
If you wish to hang it on the wall, apply two small mirror plates to the back

Boy the Younger's Blue & Green tray

Boy the Elder's Gothic tray

7 Comments

Filed under Collecting, Decorative, fashion, Household Hints, Indoor Activities, Leisure, Re-use Recycle, Tips, Skips and Scavenging

Things to Make and Do at Easter: Part 3 – Egg Decorations

FABERGE STYLE EGG DECORATIONS

These eggs are so simple to make but look wonderful, particularly if you hang them on a small branch.  You can buy sheets of bead stickers and ribbon stickers at craft shops and good stationers, and haberdashers with have ribbons and beads and often have bags of off-cuts or assorted oddments which are perfect for this sort of thing.

Think through your design before you start and lay your materials out.  They take a little bit of time, but you can go off and do other things while they’re drying.  And of course you can use the egg to make Hot Cross Buns and Simnel Cake.

You will need:
Eggs for blowing
A sharp, long, thick needle
Acrylic paints
Paint brushes – assorted sizes
Clear varnish to make them extra hard
Beads, ribbons, stickers etc for decorating
1/8” / 5mm ribbon to make hangers
PVA glue (because it dries clear)
Scissors

Method:
Make a very small hole at each end of the egg
Poke your needle into the egg to break it up
Position your egg over a bowl and blow through one end until all the egg is out
Leave to dry
Paint your egg carefully with acrylic paint.  You will need more than one coat to get a thick, dense colour, leaving to dry between each coat
When all the coats of paint are dry, apply the varnish to the whole of the egg and leave to dry
Decorate with beads, ribbon, stickers etc and leave to dry

To make the loops:
Cut a length of thin ribbon about 6 times the length of the egg and thread onto the needle so that the ribbon is exactly in half
Thread the ribbon through the bottom hole and out through the top hole, leaving the two ends hanging out of the bottom
Tie off the ribbon neatly at the bottom so it can’t slip through the hole
Put a tiny dab of PVA glue around the hole at the base of the ribbon to set it firm and leave to dry

Post Script 19.04.11:  You can thread the ribbon through a medium sized coloured button on the bottom and glue it on.  This completely covers the hole and makes a very neat finish.

1 Comment

Filed under Children, Decorative, fashion, Indoor Activities, Leisure, Seasonal

Make a Shield out of a Hub Cap: A Two-fold Activity for Marauding Vikings

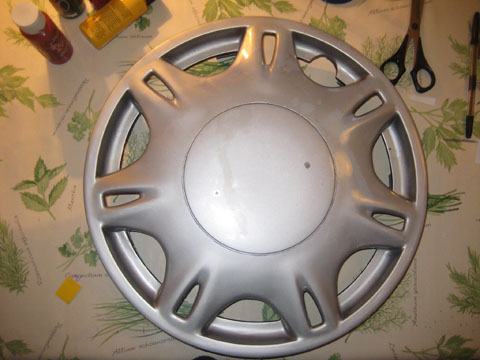
A scavenged hub cap

A scavenged hub cap

Now that the days are getting shorter, the smaller members of the family are going to need more things to do indoors. 

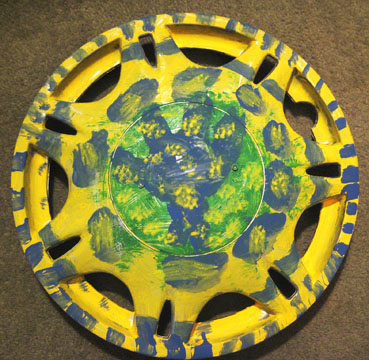
I noticed a few years ago how many hub caps from, presumably, bumped cars are left strewn about the roads, both in the town and the countryside and I was struck by how much they resembled Viking shields.  I brought one home, washed it in hot soapy water and took off any obviously sharp bits.  I found an old D-shaped drawer handle which I screwed on to the back and bingo! ready for painting.  Children can then spend a happy hour painting their shields and many happy hours fighting each other with a protective shield to reduce injuries.

What I actually did was to hold a party for Boy the Elder, where his friends were invited to come round dressed as Vikings.  They spent an hour or so painting their shields, stopped for tea and games and then had free time to run around fighting each other with a protective shield to reduce injuries.  They had been instructed in advance to come tooled up!  It was a huge success. 

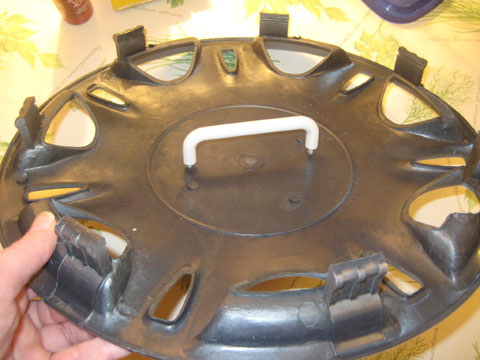
The handle attached

The handle attached

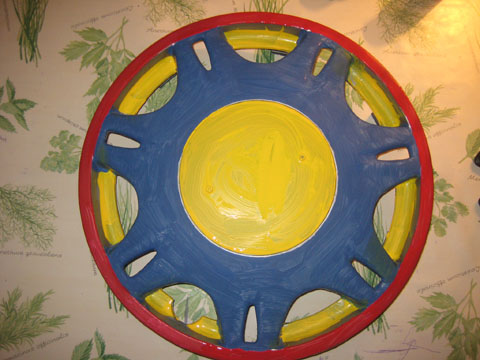
I find that acrylic paints work the best and are available in all good stationery and art supply shops.  They cost about 99p a bottle but last for ages and can be used for all sorts of projects including your own creative activities.  Do wear an overall though, because although the paint washes off clothes if you get to it immediately, if it’s left on, you’ve had it.

For the shield pictured above, I did buy a pair of plastic handles for 99p from Homebase, but if you go to the tip or look around your neighbourhood for people with skips outside, you can usually find something suitable for nothing.  Just make two holes for the screws with a bradawl or drill and screw the handles on, it only takes 5 minutes.

1st coat of paint

1st coat of paint

If you are absolutely determined to educate your children at every turn, you can get some books about Vikings and use them as reference to get some design ideas.  Alternatively you could just buy them a Playmobil Viking set and copy that – they’re actually remarkably accurate!  And they click so satisfyingly…

Da-DAA!

Da-DAA!

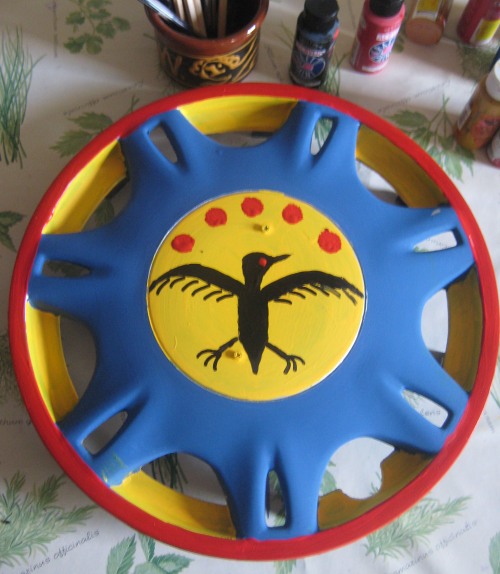
Boy the Younger's shield (in which he is well pleased)

Boy the Younger's shield (in which he is well pleased)

9 Comments

Filed under Children, Indoor Activities, Leisure, Tips, Skips and Scavenging

How to Display Necklaces or the Flash of Inspiration

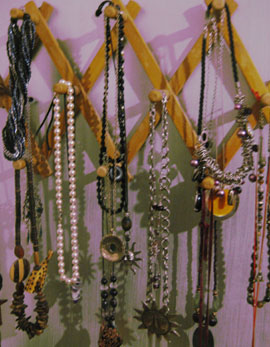
In which Necklaces 06.08.09The Wartime Housewife gets frustrated with tangled necklaces
and buys a mug rack at the village fete to get them organised.

I love necklaces; long, short, chunky, sparkly, ethnic, old-fashioned, pearls and studs.  Accounting for The Boys, I estimate that the average time for getting ready to go out is approximately 20 minutes, which includes, bath/shower, doing my hair, make-up, choosing clothes, choosing shoes (from my collection of 50-odd pairs – more on that later) and on top of that, attempting to accessorize jewellery. 

Firstly, I can never remember what I actually have and then, when I did rummage through the box, I found them in a tangled heap and simply hadn’t the time to sit down and extract what I needed.  I invariably ended up wearing the same old thing over and over again, despite having some very jolly things to choose from. 

Then, I went to the Slawston  Village Fete.  This is a super little annual fete behind the Village Hall that provides everything one could possibly want from a fete; games, second-hand books, bric-a-brac, tombolas, excellent cream teas served by smiling ladies and best of all (if you’ll pardon my French) no bloody face-painting.  God I hate face painting; I wouldn’t mind if…….  oh I’m so sorry, I shall go and fetch a cup of tea at once.   

Now. Rummaging through the dazzling array of bric-a-brac donated by those with larger attics than mine, I chanced upon a mug rack of the trellis  kind you screw or nail to the wall.  In a flash, I thought “Necklaces!” and quickly handed over my  two shillings (that’s 10p in old money).  When I arrived home, I screwed it to the side of my wardrobe, quite high up, and now all my necklaces are displayed, easy to access and don’t trail about on the top of the dressing table. 

I just put mine up in its raw state, but a creative type could paint it to co-ordinate with bedroom décor or simply in one’s favourite colours.  Acrylic paints with a coat of varnish would be perfect for this, acrylics are relatively cheap, can be bought at any art shop and last for a very long time if you keep the cap tightly on. 

Now if anyone can think of a clever way of storing earrings, please let me know.

12 Comments

Filed under Decorative, fashion